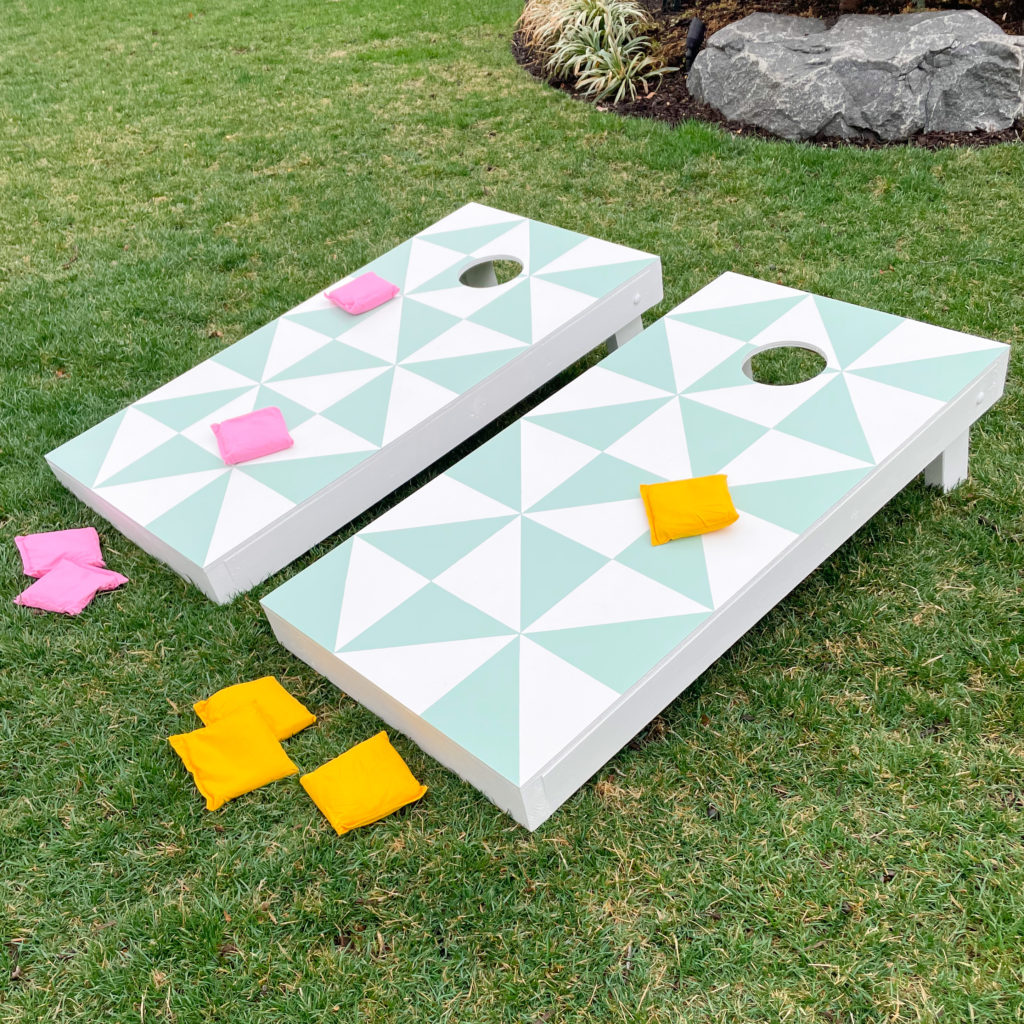
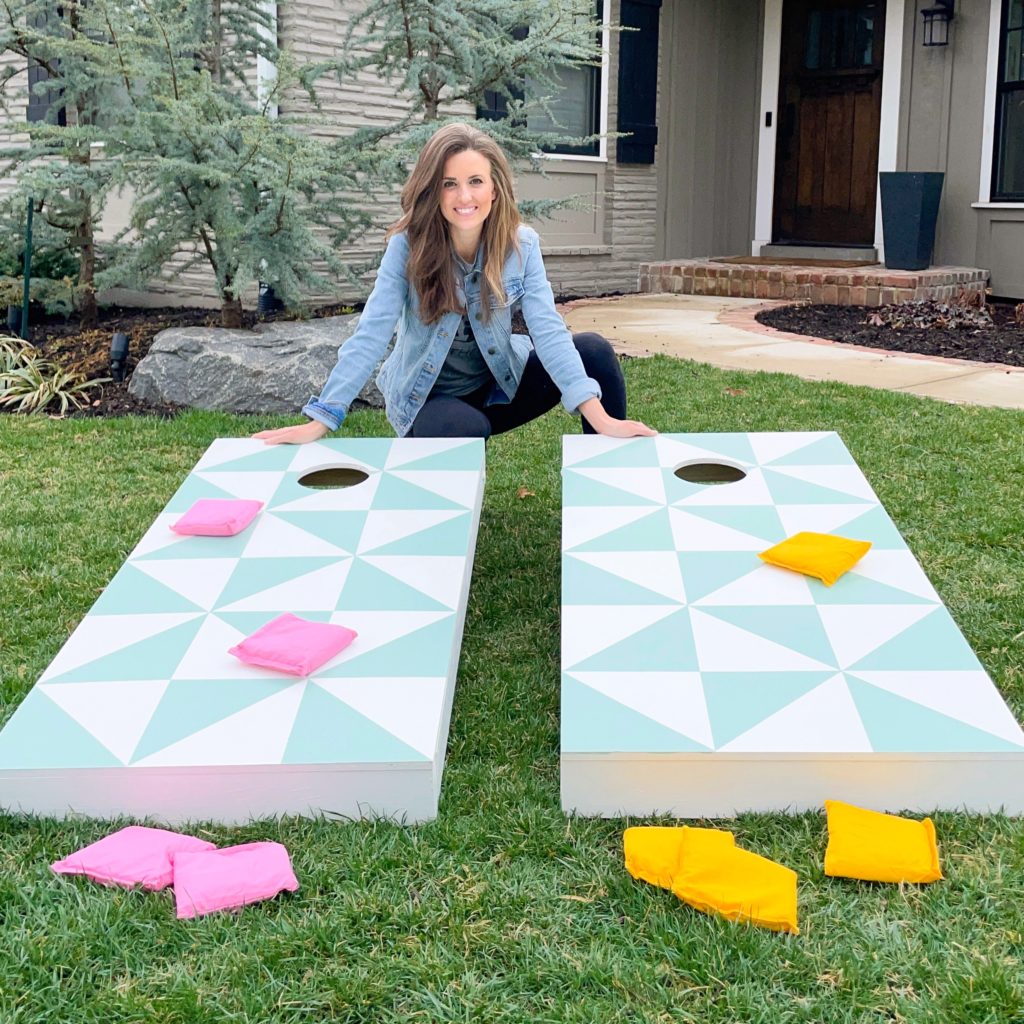
With the girl’s big joint birthday party around the corner I knew I wanted something at the party to entertain adults. I loved the idea of corn hole but didn’t love the idea of there being a tailgate game at my daughter’s first birthday party. With that, I decided to paint corn hole boards to coordinate with the party theme (flower power!)
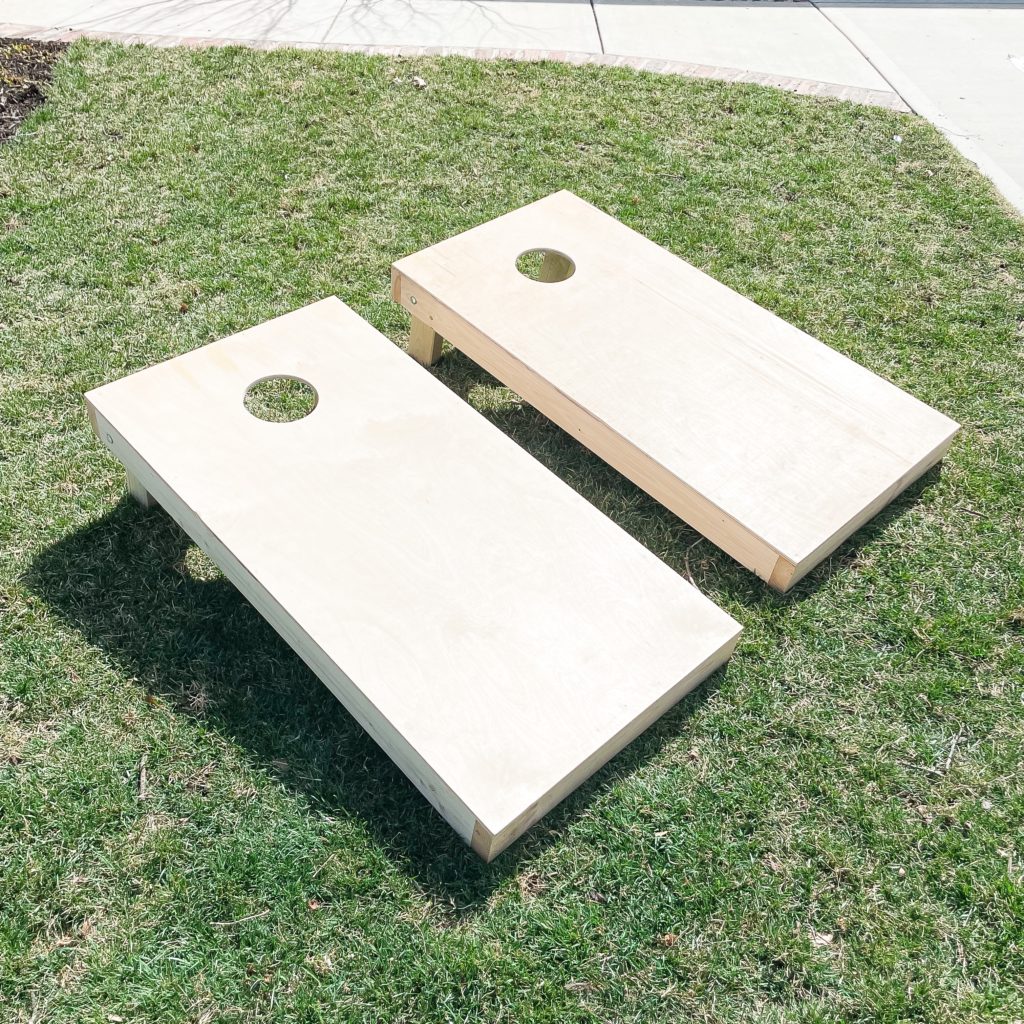
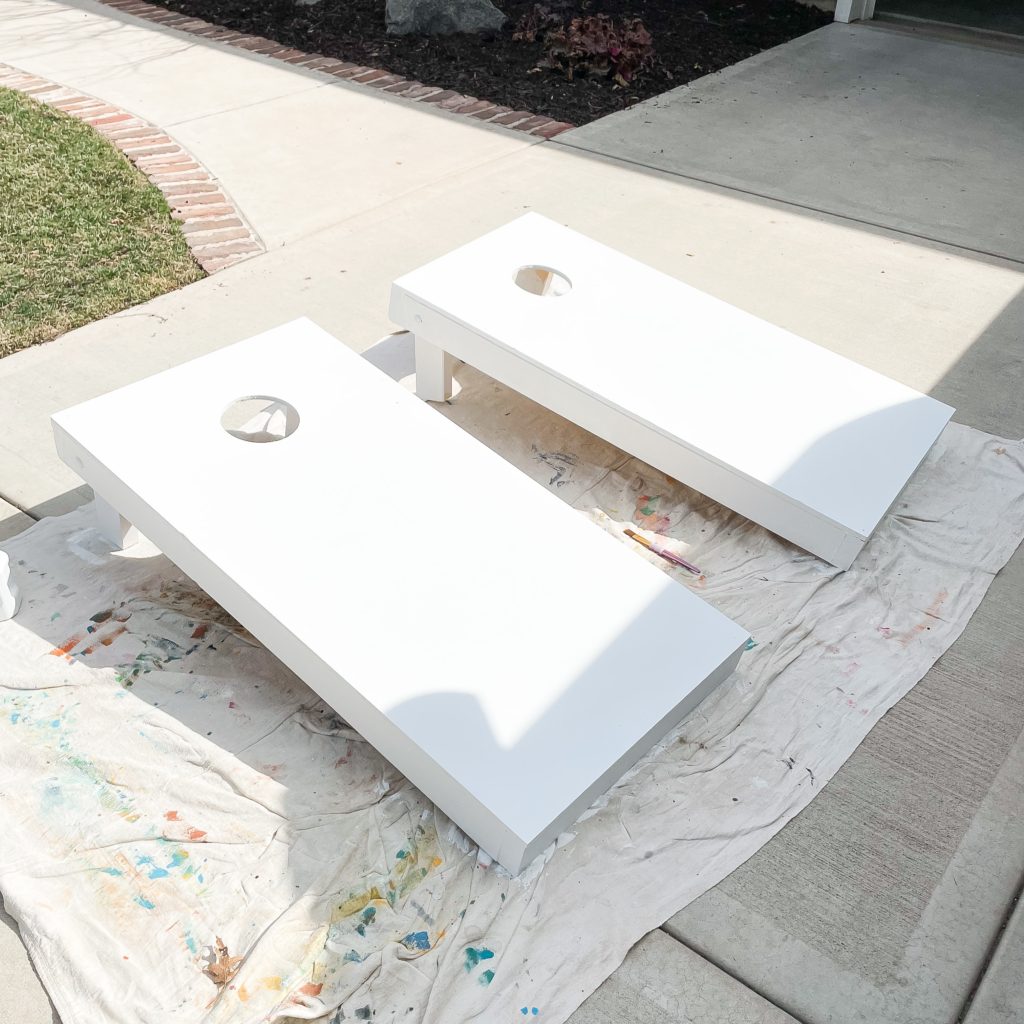
I purchased a corn hole board set unfinished. I have a ton of leftover paint samples from various projects so I snagged a sample of Sherwin Williams, Snowbound and Sherwin Williams, Kind Green and got to it! I used these roller brushes (super affordable and always reliable) and painted the background three coats of Snowbound.
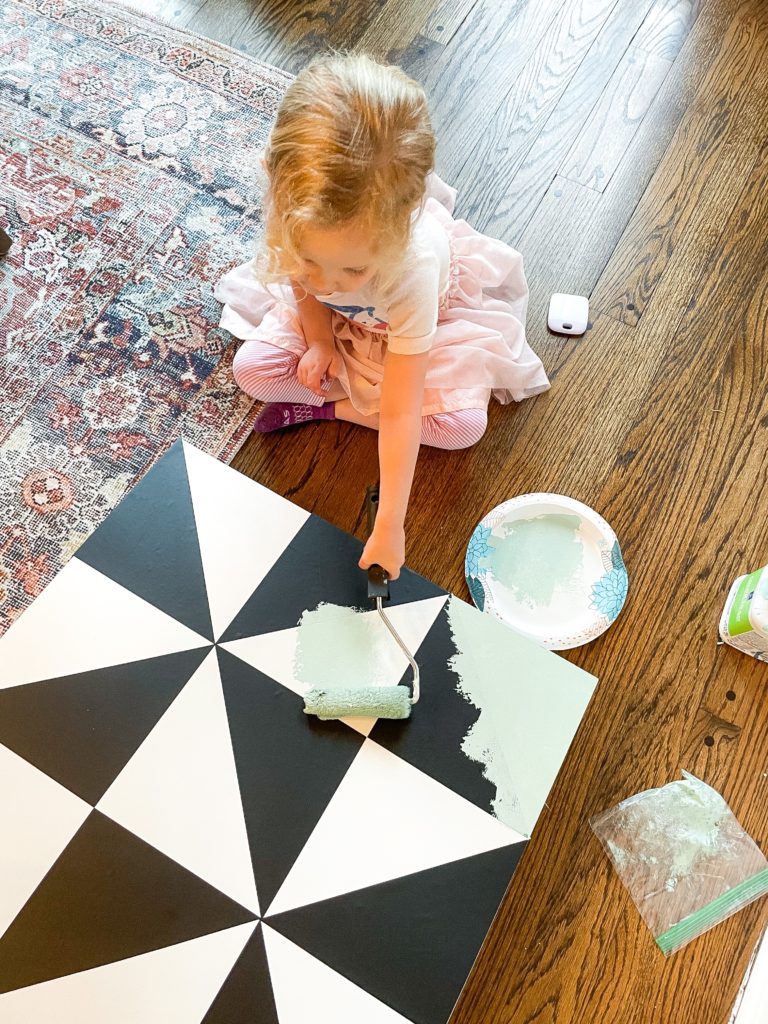
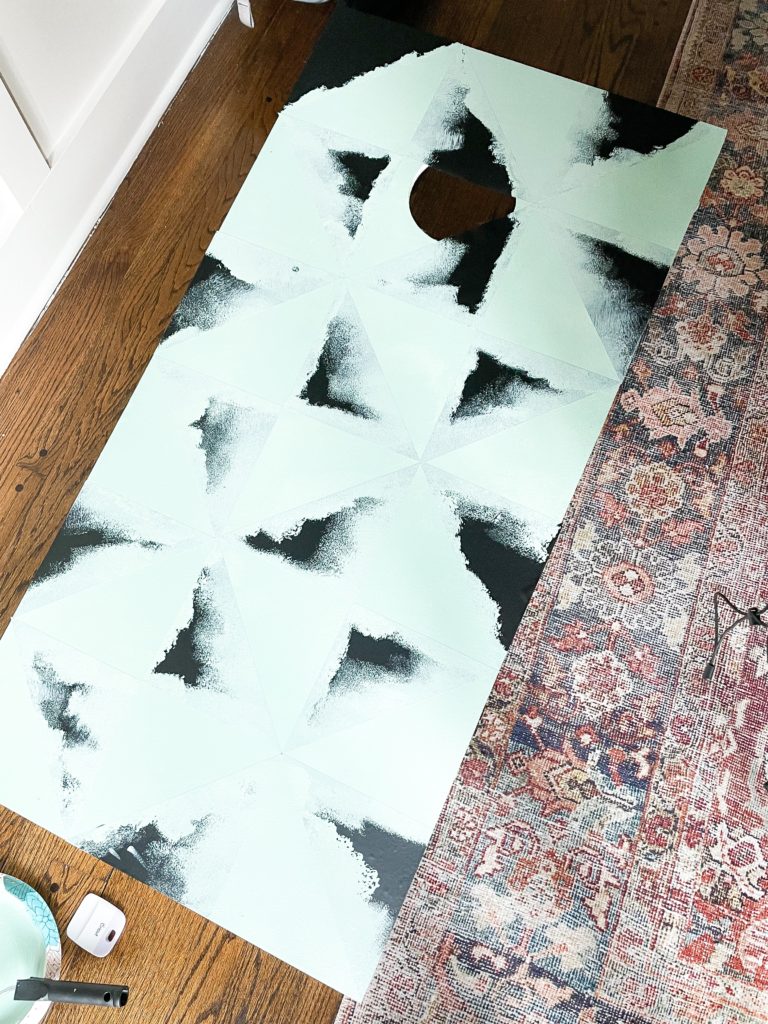
Once it was completely dry, I used my Cricut Explore Air to create a vinyl stencil (I used this removable vinyl). I divided an 8”X 8” square in half to make 18 triangles. I then arranged them into the pattern I wanted on my two corn hole boards.
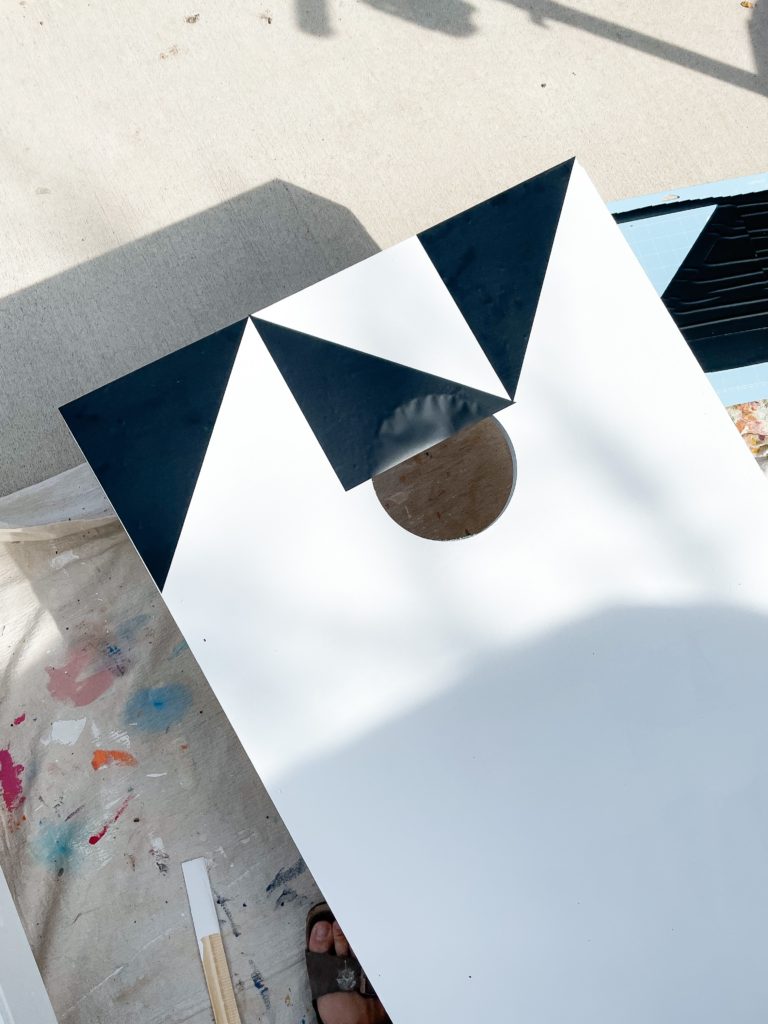
I then painted the white areas, Kind Green (2 coats). Once the green was completely dry I removed the vinyl (so satisfying). A few areas needed touching up – I used painters tape to make every line perfect.
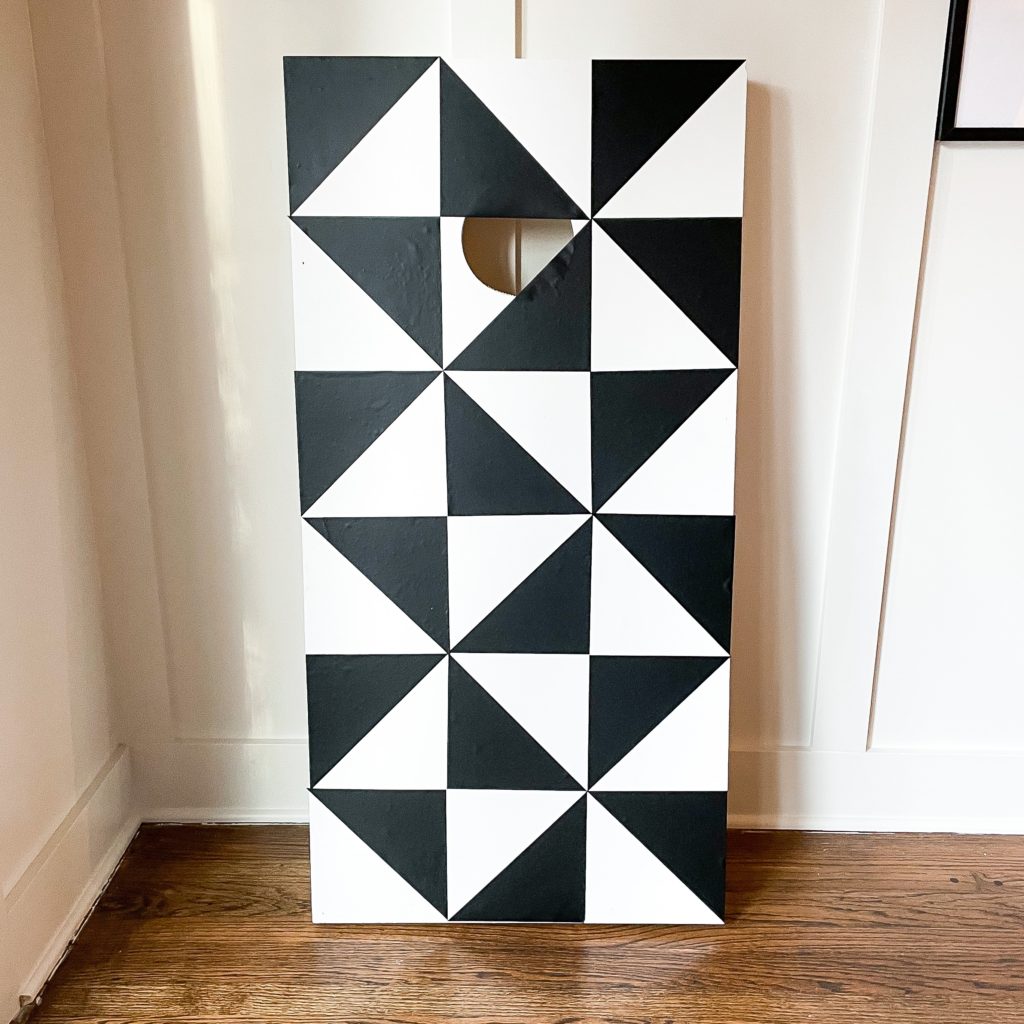
Lastly, I sealed the entire board with this polyurethane, in a satin finish.
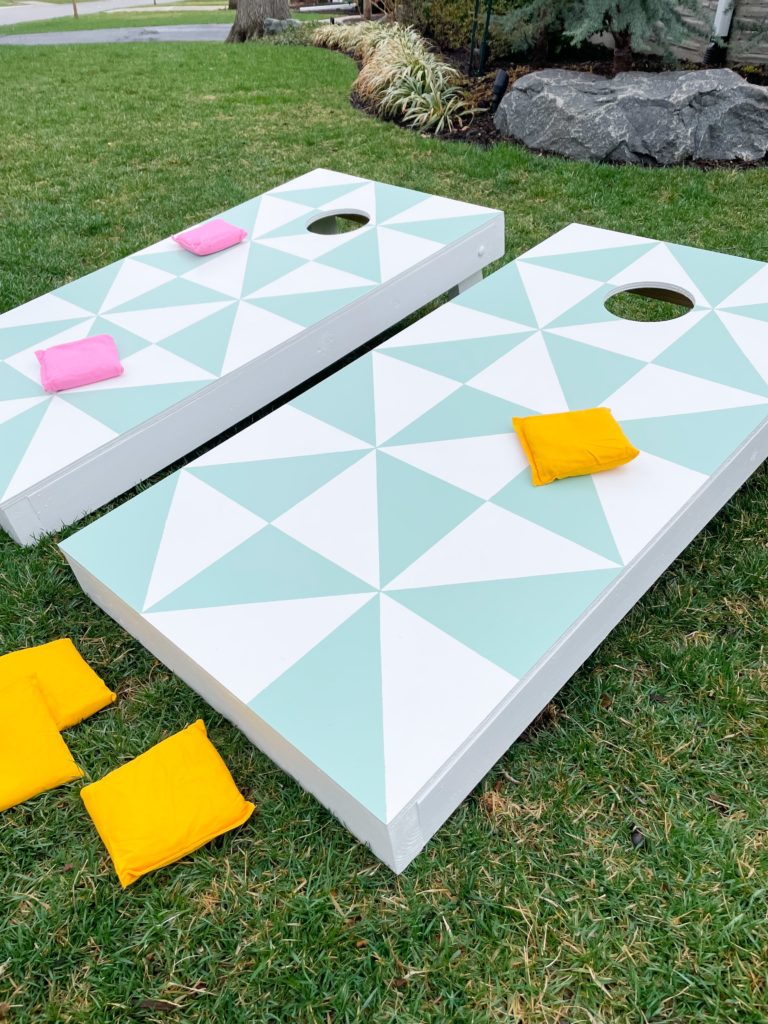
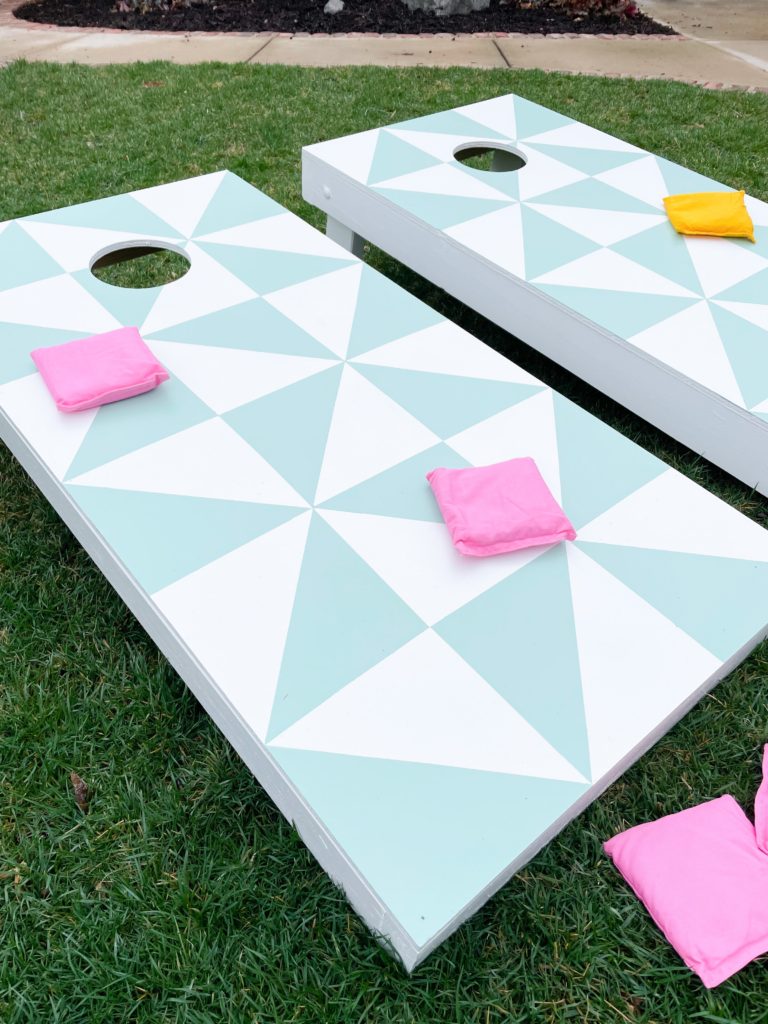
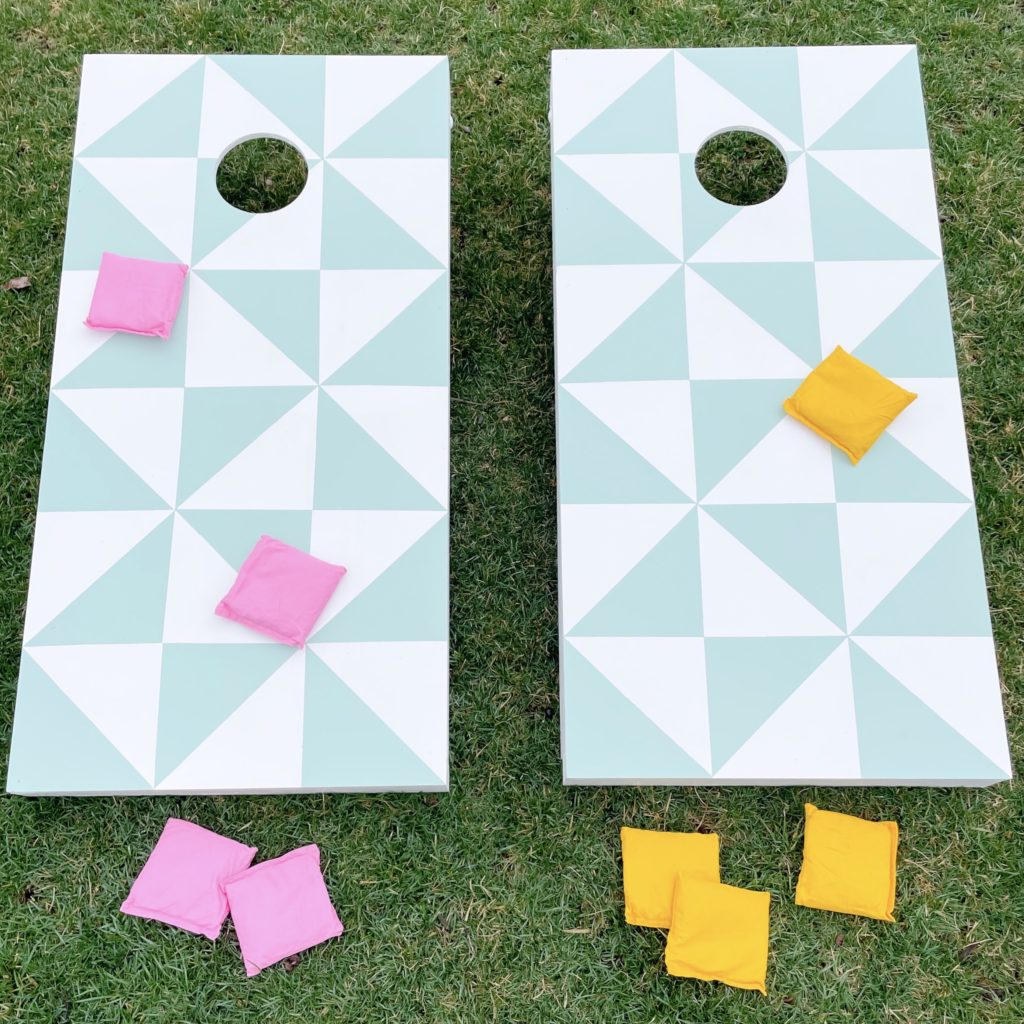
The boards turned out PERFECT!!! They go with the theme while also being neutral/ generic for later use. I also purchased a set of yellow and pink bags to again, go with the theme!
This project was so fun and easy! If you don’t have a Cricut you could cut 8X8 vinyl squares, divided in half to achieve the same pattern.
I’ve listed all the products I used below!
Leave a Reply