Last week I spontaneously decided to makeover our entryway. Since quitting my job to stay home with Bennett and work on Mindfully Gray full-time – I spend most of my time day dreaming about project I want to tackle around the house. Surprising, right?
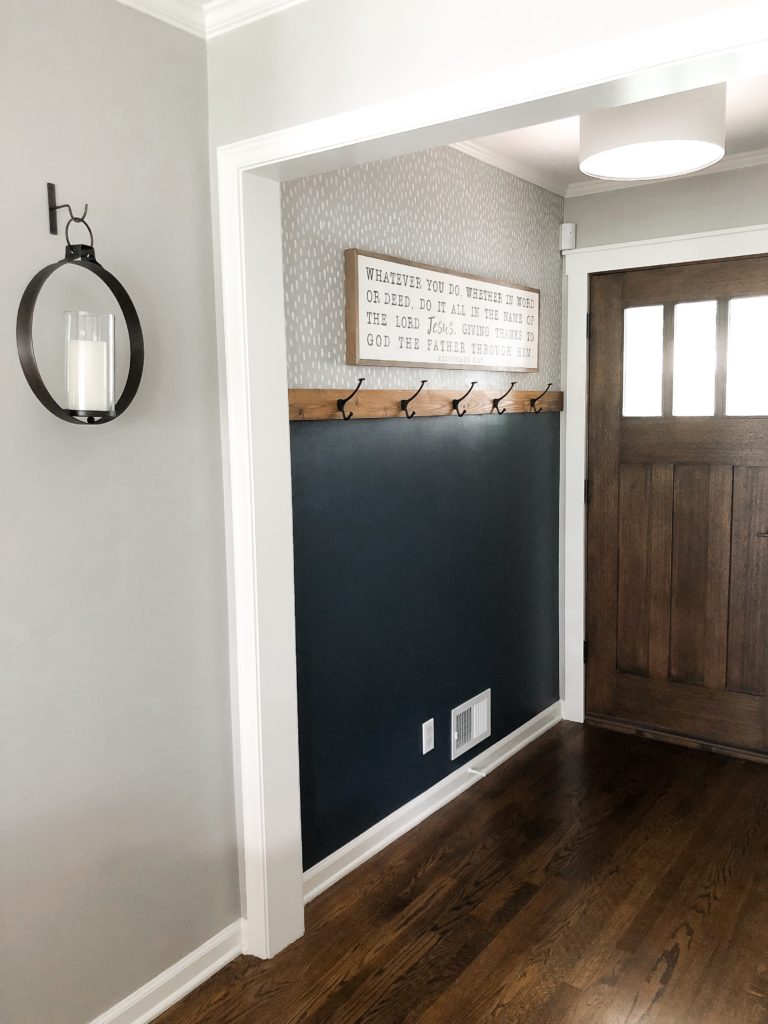
This entryway project was literally one I dreamt about. It is by far the easiest project we’ve done to date and it took one day to complete. ONE. DAY. I documented the entire process on my Instagram stories (check out my “Entryway” highlight for more). Here’s a look at the design board I created prior to getting started (see more about the design and budget HERE).
DESIGN BOARD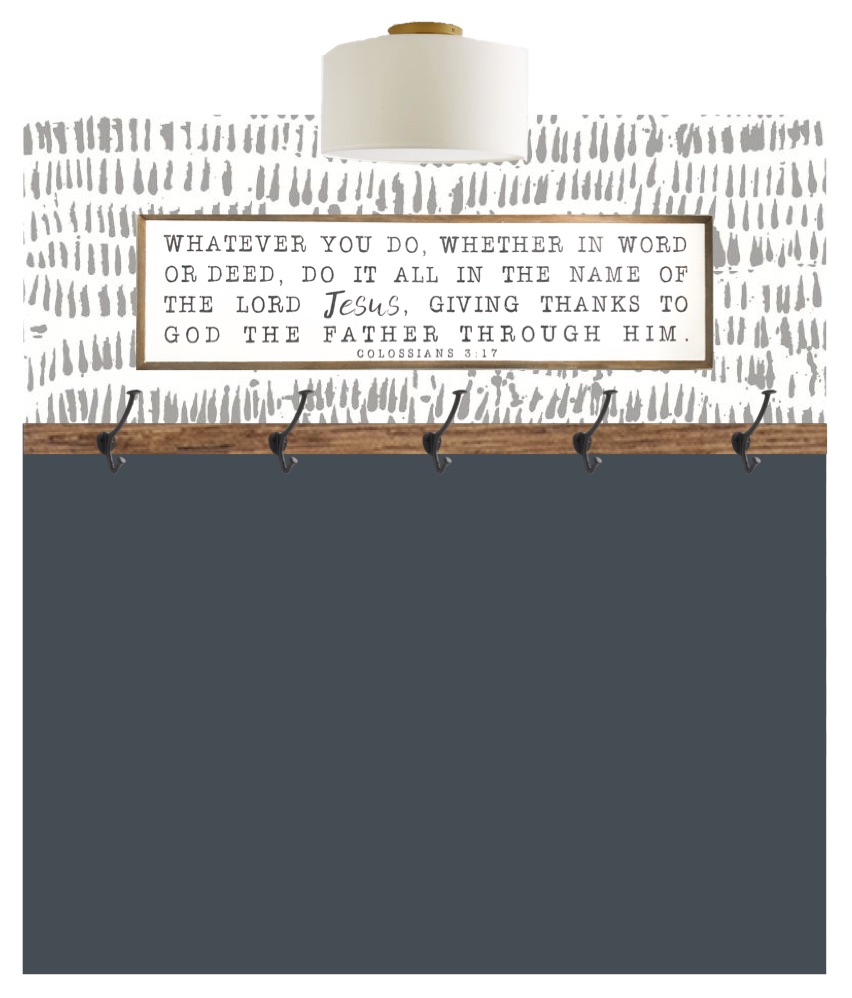 BEFORE
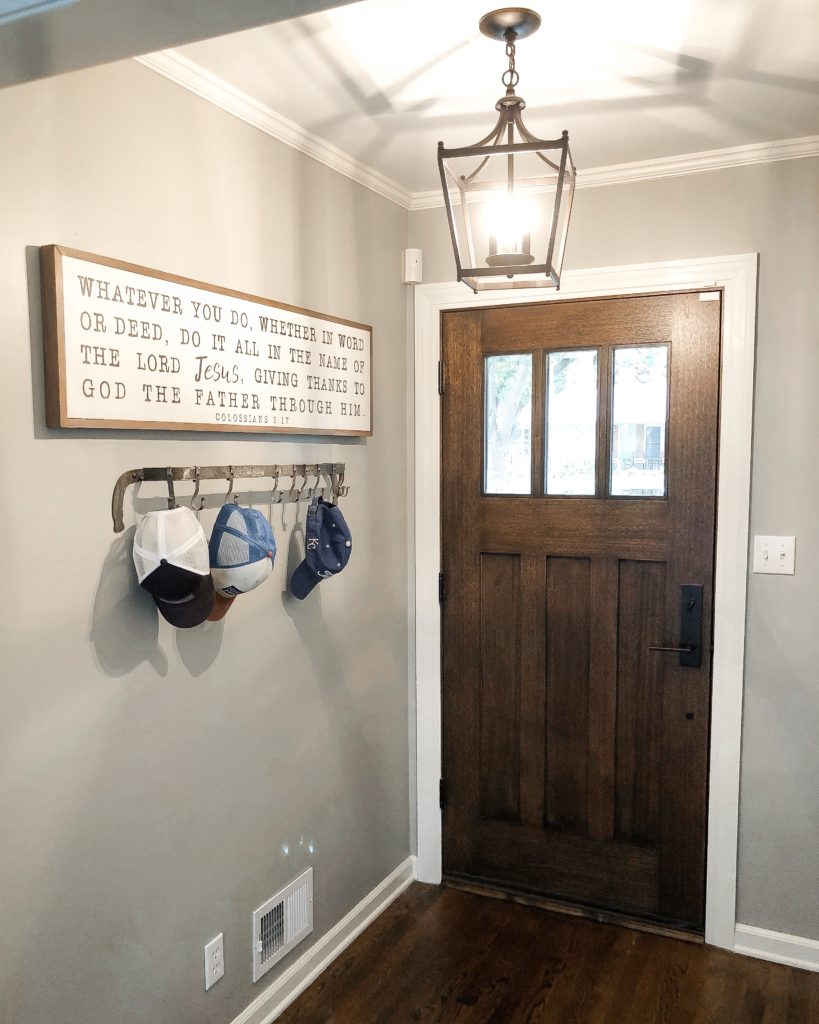
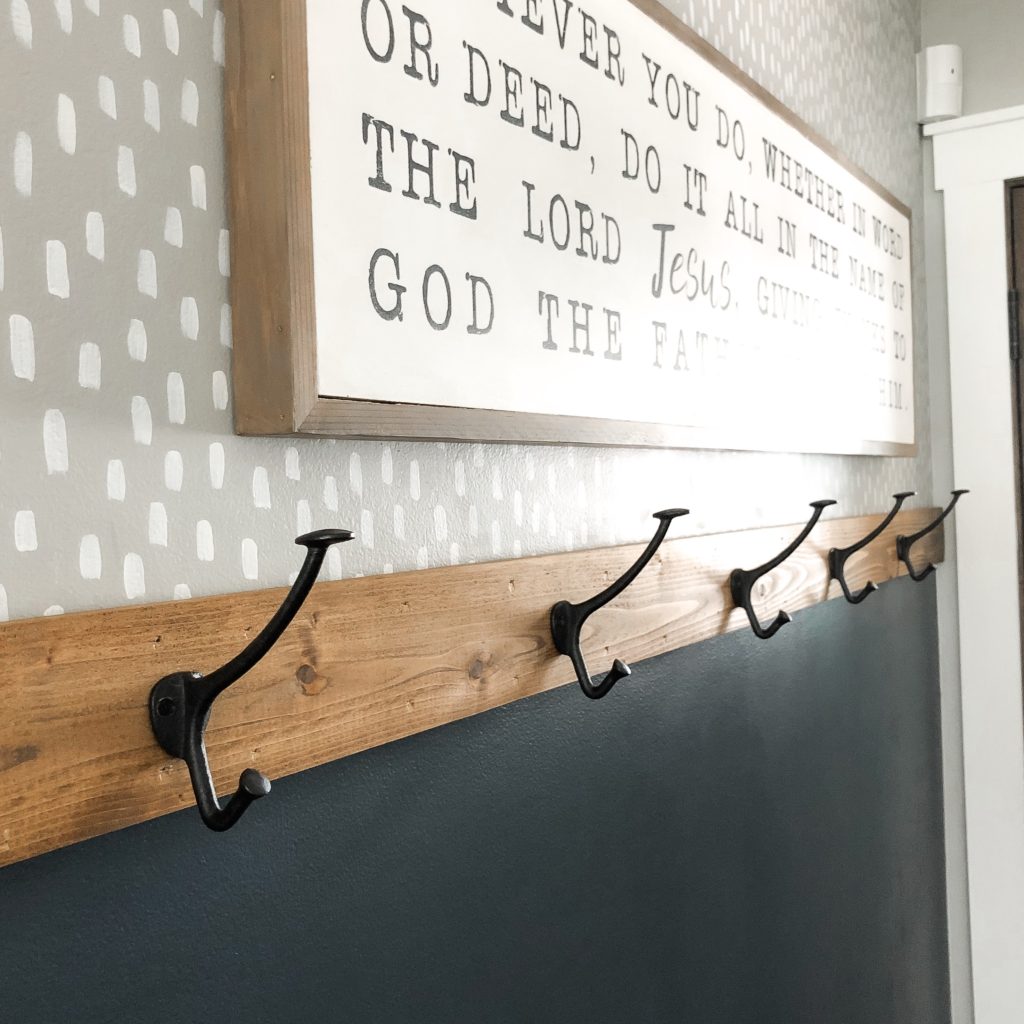
AFTER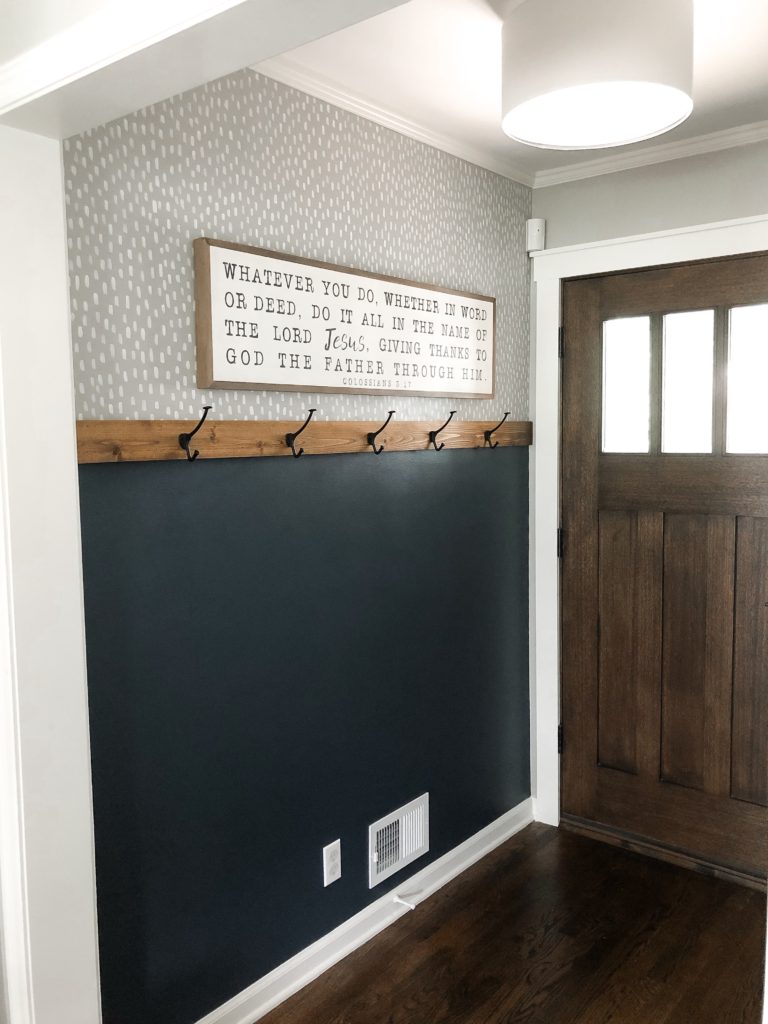
The best part about this project is, you don’t need much and you don’t have to be “artsy” to do it yourself!
Supplies needed:
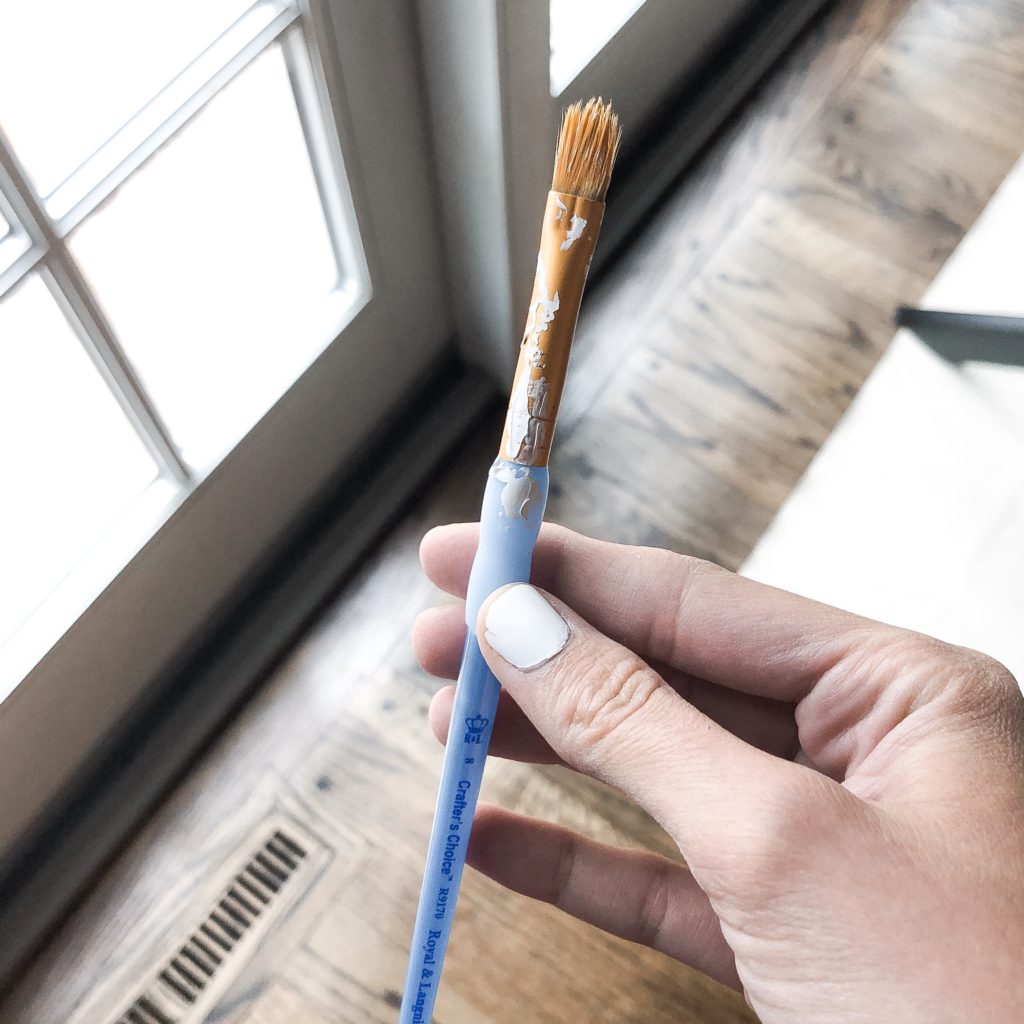
- Paint brush (see the image below for the cheap Hobby Lobby paint brush I used)
- Paint roller
- One quart Sherwin Williams, Alabaster (I used SW Emerald paint in a Satin finish)
- One quart Sherwin Williams, Sea Serpent (again, I used SW Emerald paint in a Satin finish)
- One cedar board cut to your desired length (Hone Depot cut the board for us)
- Nail gun (this is the one we have)
- Minwax Early American stain
- Wall hooks (I purchased these)
- Painter’s Tape
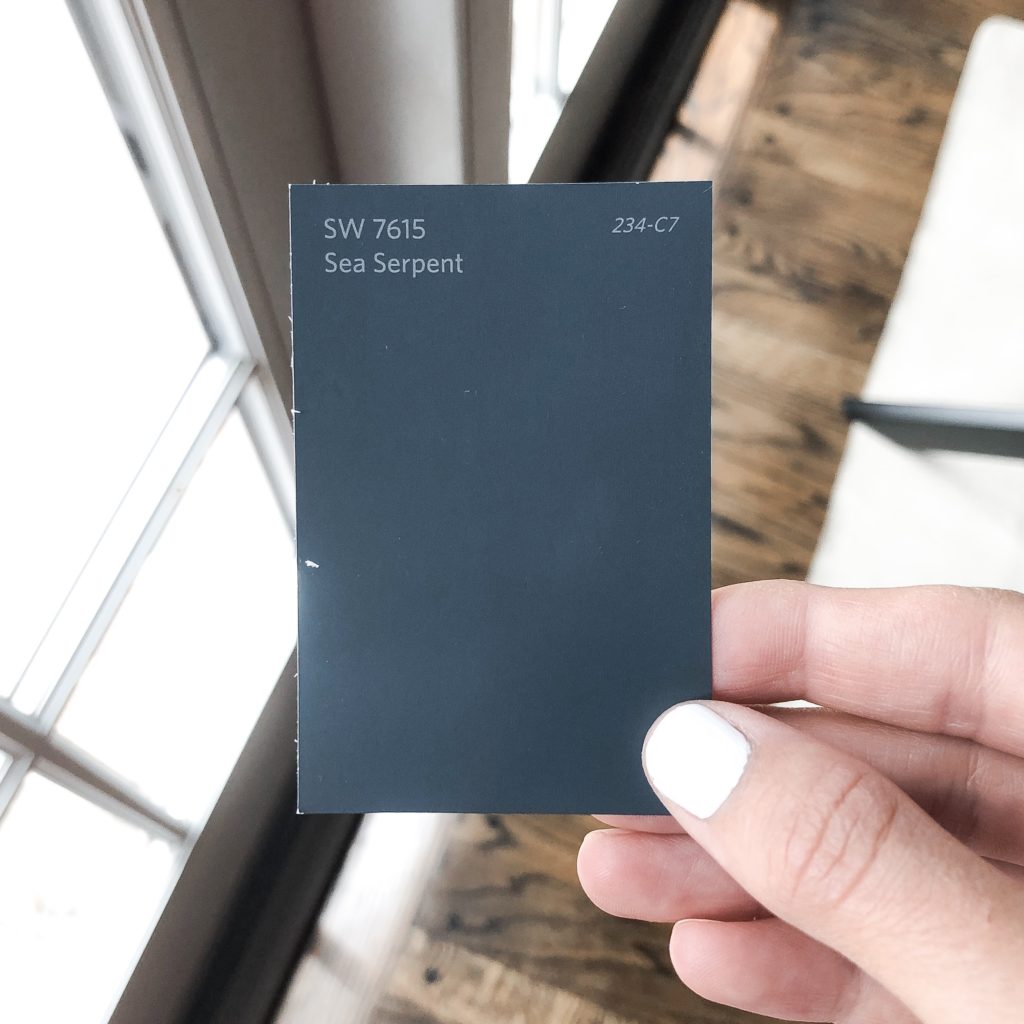
I’ve listed the paint colors I used but you could pick any paint colors you’d like!
Step-by-Step How-To:
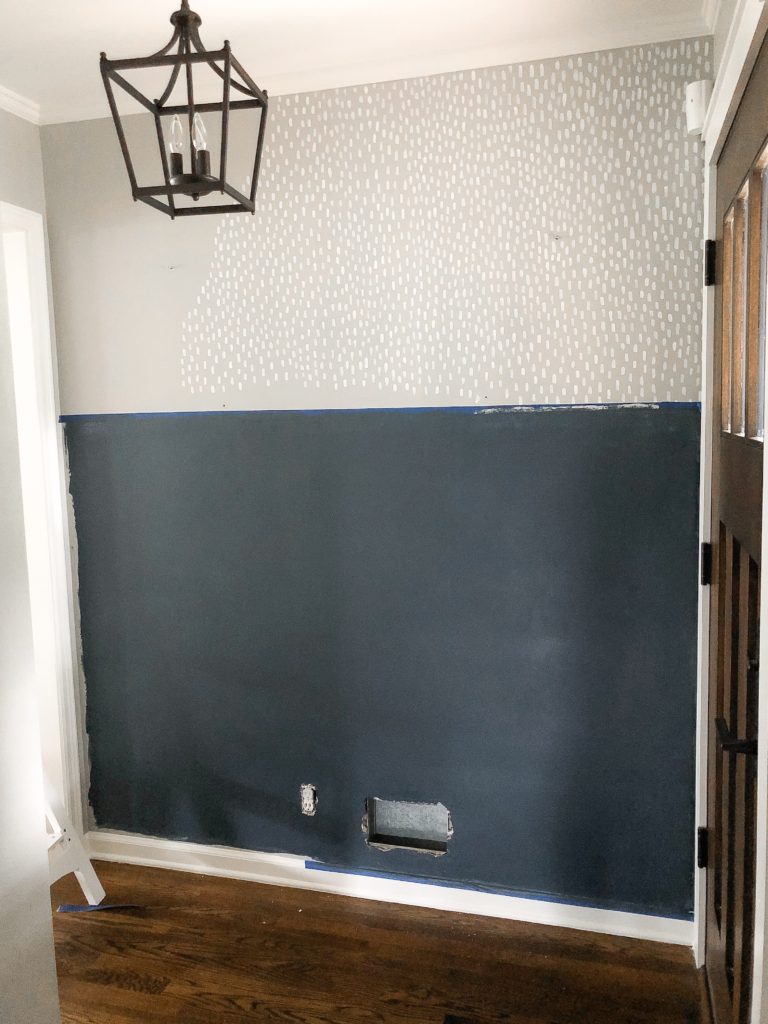
- Use painter’s tape to tape off the edges and the section you plan to paint Sea Serpent from the section you plan to paint the dots. We have 8ft ceilings – I painted Sea Serpent 5ft up the wall and the dot pattern on the top 3ft of the wall.
- Next, begin painting dots / strokes. There is no exact science to it. I painted strokes sporadically. Sometimes my stokes would get longer than I’d like or closer together. I never painted over them and started over – I simply corrected myself as I went. I love how imperfectly perfect it turned out.
- Paint the bottom section of the wall Sea Serpent using a roller.
- Stain your precut cedar board (or you could use any type of wood you’d like).
- Mark the studs on the wall and use a nail gun (here’s the nail gun we used), nail the board into the studs.
- Pre-drill your holes to hang your wall hooks on the board. Next screw your wall hooks into the pre-drilled holes.
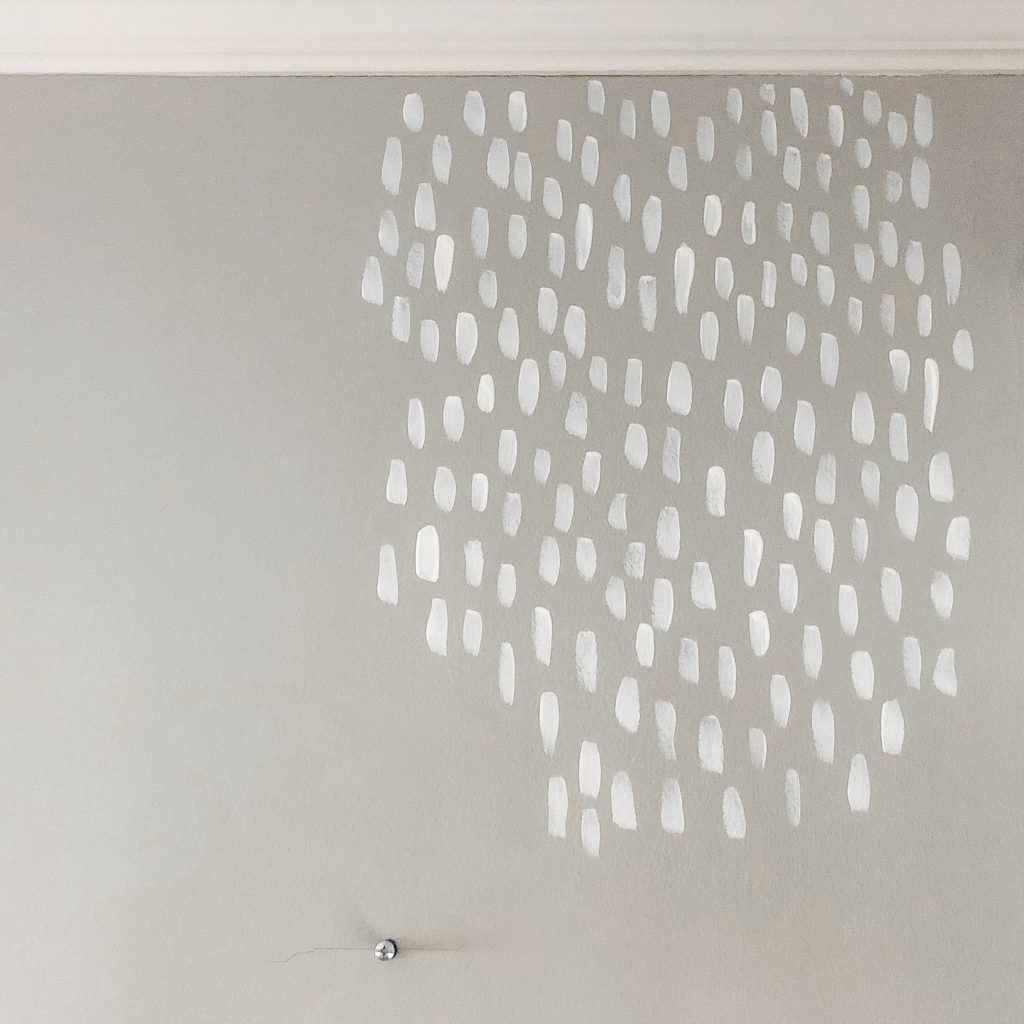

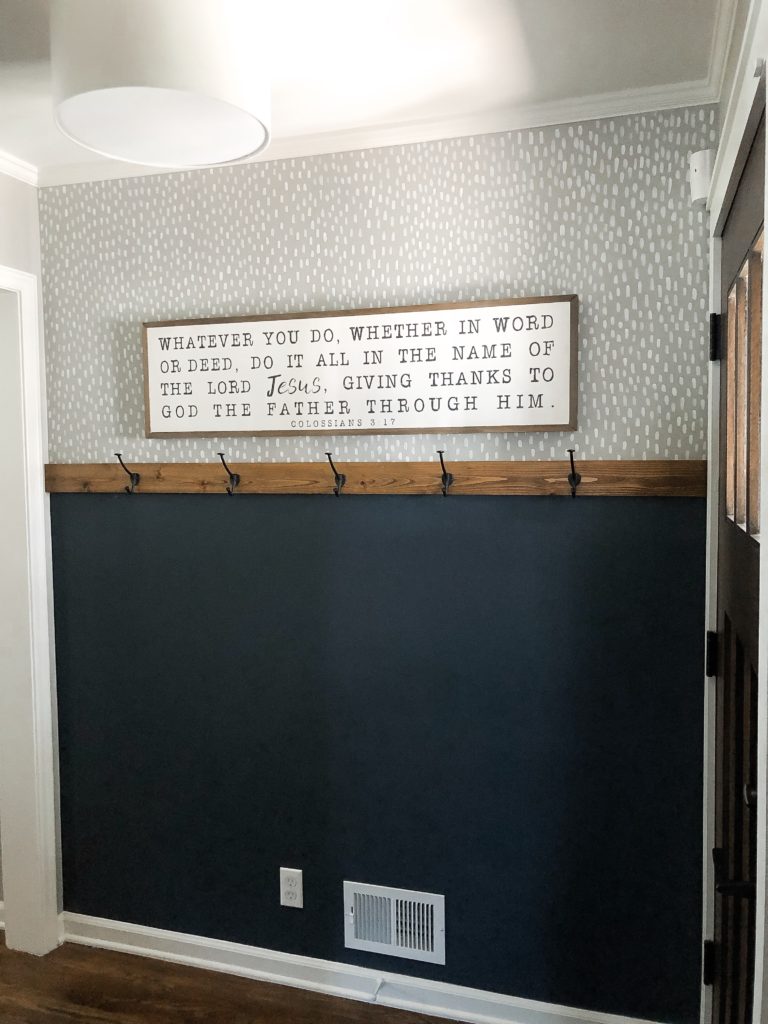
Here’s an up close look at my brush strokes – See, I wasn’t kidding. Super easy. No technique. Even a caveman could do it.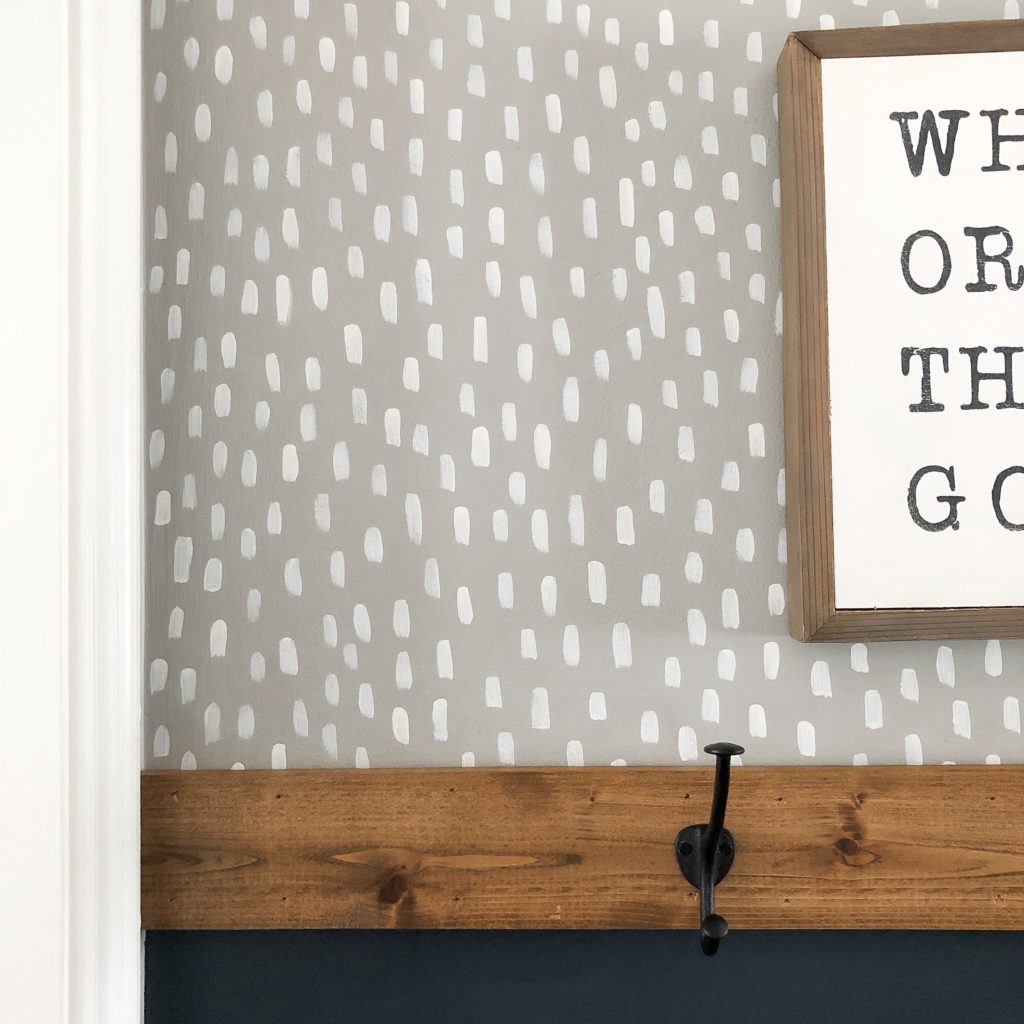
Part of this entry project was also updating our light fixture! Our existing light fixture hung a little too low for my liking. It made the ceiling feel lower than I’d prefer. This new light fixture softens the space and makes the ceiling feel much higher! The contrast of the Sea Serpent with Alabaster is harsh so the linen white shade softens the space and really sealed the deal for me!
Other FAQs I received on Instagram:
Q: Where is your wood sign from?
A: It’s from a company that used to be called Freeboard Coop – They since changed ownership and is now called The Heart Song Company. Here’s a link to our exact sign!
Q: What color is behind the Alabaster strokes?
A: Sherwin Williams, Mindful Gray is behind the white strokes.
Q: Would this work on textured walls?
A: Totally! Our walls are textured. I learned that putting up removable wallpaper on textured walls doesn’t work too well. The texture causes there to be air bubbles in the wallpaper. It’s not a huge deal in a kid’s room but in a main living space – I wouldn’t do it. This painting technique is a great alternative! Looks like wallpaper but costs WAY less and is WAY easier to apply.
Q: What are your favorite Minwax stain colors?
A: Early American, Driftwood, and Puritan Pine
Let me know if y’all have any other questions I might have missed!
Thanks for stopping by!
Jamie
I love the stain color of the front door. What color is the stain?
Thank you – Dark Walnut gel stain!
What size wood is that?
It is 3.5″ wide
So nominally 1×4?
Yes
What height did you place the wood border?
From the floor to the top of the board is 60.5″ and the board itself is 3.5″ wide.
Hello, I love your entryway! Just curious where did you find the coat rack, or was it a DIY?
It was a DIY – We bought and stained the board and attached hooks to it!
Beautifully done! Thank you for sharing. Do you mind posting the link to your hooks? Thanks.
Can I ask what color are your hardwood floors?
Dark walnut!
I absolutely love this! I saw it on Pinterest and was like “where’s that wallpaper from?”…to my surprise and delight it is paint! Wallpaper is SO expensive so I love this idea! I may do this today in my sons bathroom..our walls are already mindful gray so this would be perfect! So happy I found this post and your inspiring blog!
Do the hooks at the end hit the door when the door is opened? I am about to start this project but am not sure if I should buy hooks where the door will be when open. Thanks! Love the idea.
We installed a door stop so the door doesn’t hit the hooks!
Good Morning! Love what you did with the entry!! Do you mind sharing where you got your entry light or one similar to it? Thanks!
What are the dimensions of your cedar board and what stain did you use for it?
Hi I was wondering the color of your white trim? Did you use Alabaster for that as well?
Yes! It’s Alabaster!
Hi what about the 4 prints of flowers you also have up instead of your sign in another photo. Where are the prints from?
Where did you get the flower prints?
Walmart! I provided a link to them in my post!
what door is this?
It’s from McCray lumbar
Love it!!! Where did you buy the wall frame?
Hi there! What is the width of your wall? I’m trying to figure out how many hooks I want on my wall 🙂
Did you do this to both sides of the wall or just one? What does the other wall look like?
Where did you get the hanging circle candle holder?
Did you just screw the wood board with the hooks into the studs?
Yes!
What does the other side of the entryway look like? I am wondering how you tied it together.
It’s a hallway!
It looks like you used the nail gun on the top and bottom of the board, more frequently than just on the studs of the wall. Would you suggest nailing the board on the wall both where studs are located and in between?
Hello Jamie!
Absolutely love this little hallway and have done the same in our little hallway! I am interested in knowing where you purchased the circular candle holder. I have artwork that has black circles on it and this would be a great compliment to that artwork.
You aren’t kidding when you talk about the expense of wallpaper! Painting the lines yourself is so clever and your wallet is thanking you and maybe your husband!!!!
Hi Jamie! I was inspired by your project to tackle my own little entryway update! I opted for peel and stick wallpaper on the top and love the way it turned out! Thanks for the creative inspiration! Would love for you to check it out! I wrote all about it on my blog https://aftonleighhome.com and shared your picture as my inspiration 🙂 I hope that’s okay! Thanks again!
What an amazing transformation! This entry way turned out so beautiful. I am setting a goal to do a couple home improvement projects this year. I think we are going to start out with some kitchen cabinet refinishing. Thanks again for sharing your beautiful ideas! You are so inspiring!
So I’m doing this same process and just chose a different shade of dark blue but still sherwin Williams and eggshell finish which has a sheen like satin….. I noticed that even if I touch the wall with my finger it leaves marks(not a scratch but can just see the finger or hand marks) how many coats of paint did you do and have you noticed the same easy wear?
How far apart are your coat hooks? LOVE this tutorial!
Did you pre-condition your wood before staining?
Nope! Maybe just a light sanding